Create Stack
Create New
1. Stream Animate > Stacks > + Create New Stack Animation
![]()

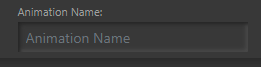
2. Add a name for the animation – Animation will not play without it
1.
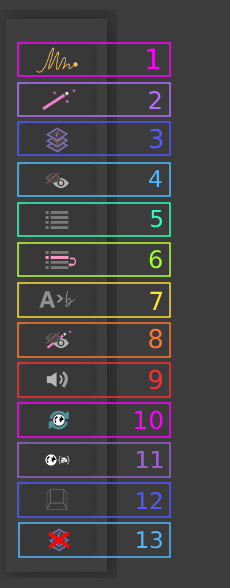
Add ‘Transform Animation’ to Timeline
a. Select a Transform Animation from previously created.
b. Add the Transform Animation to the Timeline – Plays Forwards
c. Add the Transform Animation to the Timeline – Plays Backwards (in reverse) – Not available for dynamic animations
d. Create a new Transform Animation (Opens a new window)
2.
Add ‘Filter Animation’ to Timeline
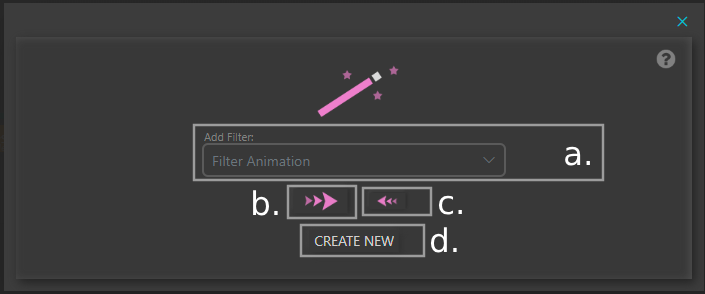
a. Select a Filter Animation from previously created.
b. Add the Filter Animation to the Timeline – Plays Forwards
c. Add the Filter Animation to the Timeline – Plays Backwards (in reverse) – Not available for dynamic animations
d. Create a new Filter Animation (Opens a new window)
3.
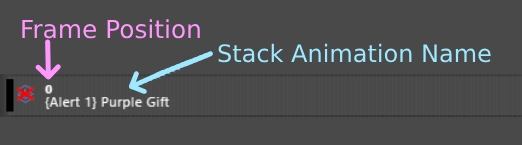
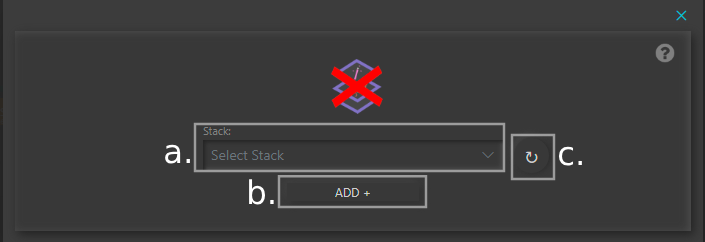
Add ‘Stack Animation’ to Timeline
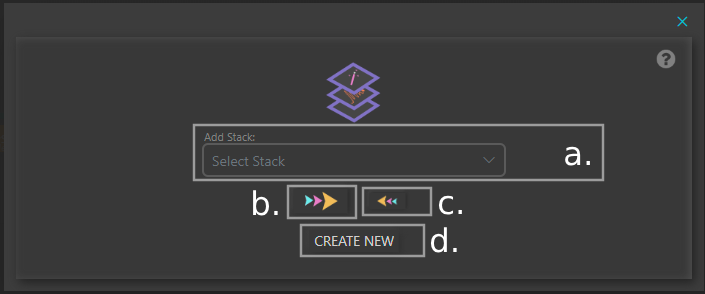
a. Select a Stack Animation from previously created.
b. Add the Stack Animation to the Timeline – Plays Forwards
c. Add the Stack Animation to the Timeline – Plays Backwards (in reverse) – Not available for dynamic animations
d. Create a new Stack Animation (Opens a new window)
Note: Stack Animation is only available to add, if the current stack has not been added to another stack.
4.
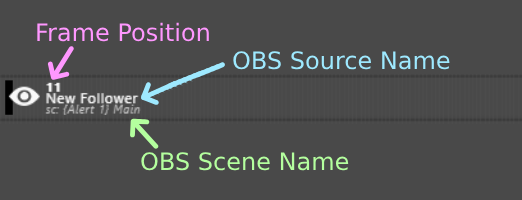
Add ‘Source Visibility’ to Timeline
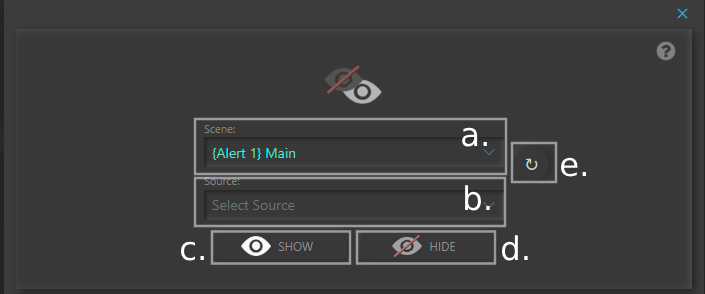
a. Select a Scene
b. Select a Source
c. Add the Source Visibility to the Timeline – Show in OBS
d. Add the Source Visibility to the Timeline – Hide in OBS
d. Refresh Scene and Source Dropdowns – (If you added a source/scene while on this view and it doesn’t appear in the lists)
5.
Add ‘Scene Change‘ to Timeline
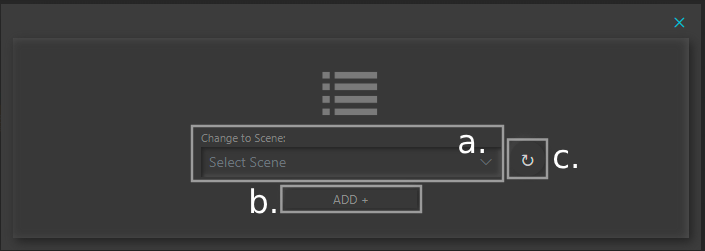
a. Select a Scene
b. Add Scene Change to Timeline
c. Refresh Scene Dropdown – (If you added a scene while on this view and it doesn’t appear in the list)

6.
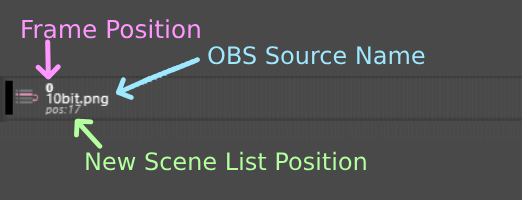
Add ‘Scene Position Change’ to Timeline

a. Select a Scene
b. Select a Source
c. Select a new position in the list. 0 = Bottom of list
d. Add Scene Position to Timeline
e. Refresh Scene/Source Dropdowns – (If you added a scene/scene while on this view and it doesn’t appear in the list)
7.
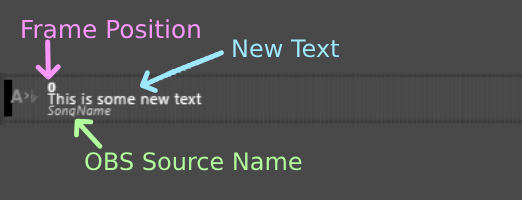
Add ‘OBS Text Source Change’ to Timeline
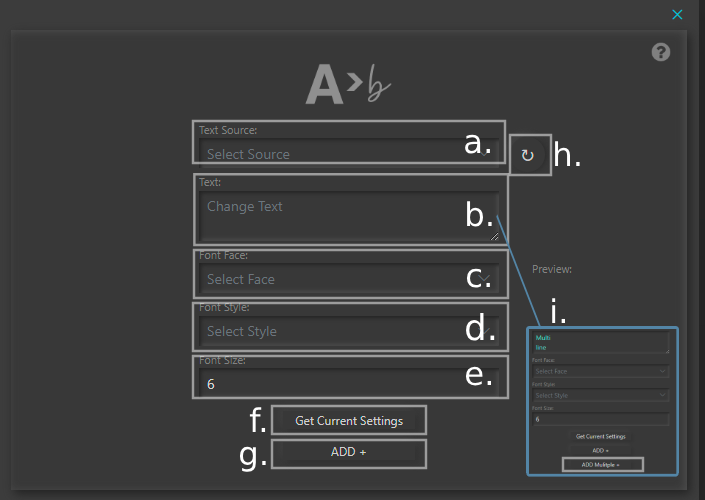
a. Select an OBS Text Source
b. Add new text
c. Select Font Face
d. Select Font Style
e. Add Font Size
f. Get Current Settings – Retrieves current font settings for the selected OBS Text Source
g. Add OBS Text Source Change to timeline
h. Refresh Text Source Dropdown – (If you added a text source while on this view and it doesn’t appear in the list)
i. If you add multiple lines to Text box, another button appears “Add Multiple +” – For each line it adds a new element to the timeline
8.
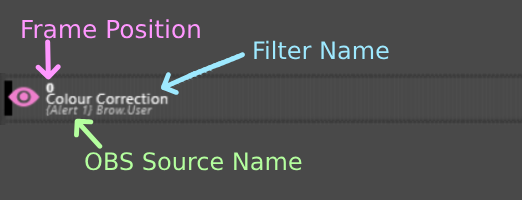
Add ‘Filter Visibility’ to Timeline
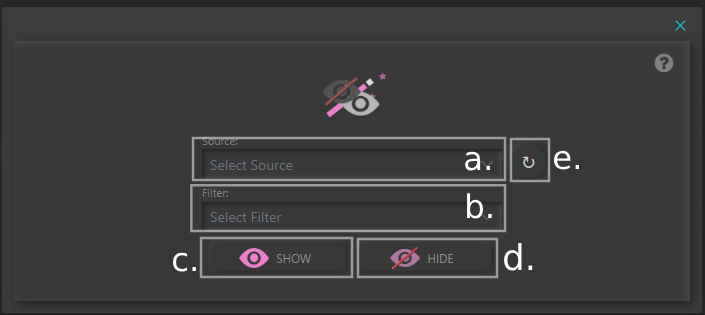
a. Select a Source
b. Select a Filter that’s currently added to the source
c. Add the Filter Visibility to the Timeline – Show in OBS
d. Add the Filter Visibility to the Timeline – Hide in OBS
e. Refresh Source Dropdown – (If you added a source while on this view and it doesn’t appear in the list)
9.
Add ‘Play Audio’ to Timeline
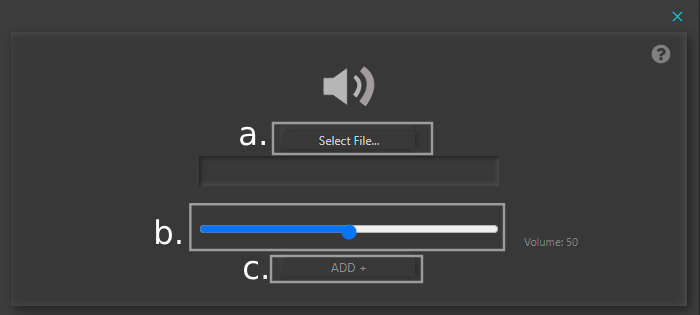
a. Select a File.. (wav only)
b. Set Volume (defaults to 50%)
c. Add the Play Audio to the Timeline

10.
Add ‘Refresh Browser’ to Timeline
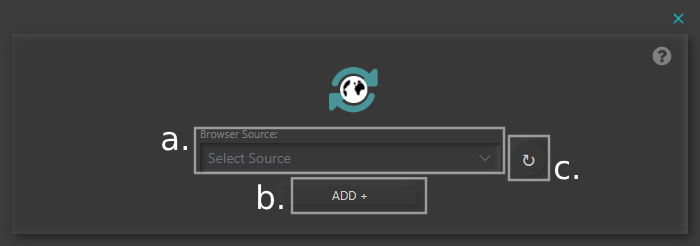
a. Select a Browser Source
b. Add the Refresh Browser to the Timeline
c. Refresh Browser Source Dropdown – (If you added a source while on this view and it doesn’t appear in the list)
11.
Add ‘Send Message To Browser’ to Timeline
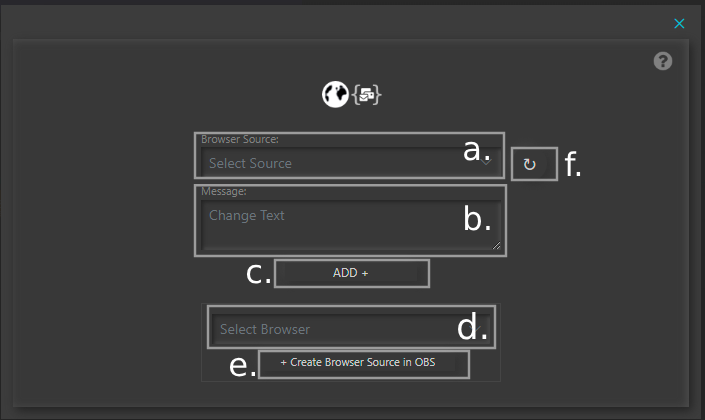
a. Select a Browser Source
b. Add a message to be sent
c. Add the Send Message To Browser to the Timeline
d. Select a from a list of pre-made html files. More info below.
e. Add the pre-made html file to OBS as a Browser Source. More info here Custom Browser Source
f. Refresh Browser Source Dropdown – (If you added a source while on this view and it doesn’t appear in the list)
12.
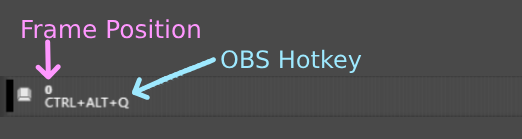
Add ‘OBS Hotkeys’ to Timeline
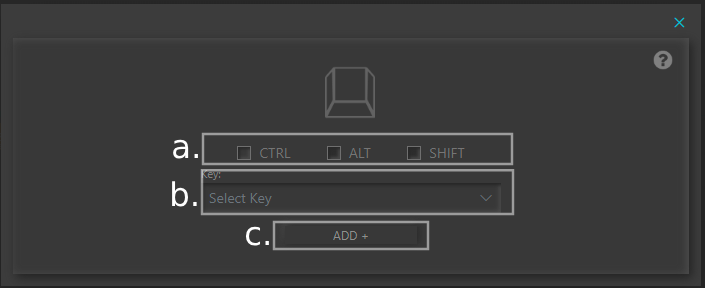
a. Select a CTRL | ALT | SHIFT
b. Select key
c. Add the OBS Hotkeys to the Timeline
13.
Add ‘Stop An Animation’ to Timeline
a. Select a Stack, Transform or Filter Animation
b. Add the Stop An Animation to the Timeline
c. Refresh Dropdown